Friday, August 30, 2019

How to Pick an Exterior Paint Color

It’s time to paint the exterior of your home. When it comes time to pick the color it can be quite intimidating. It is a color/s that will represent your personality as well as your homes architecture. Let’s be honest painting the exterior of your home is a lot of work, so you want it done right the first time! Here are a few tips and elements to consider when picking a color for the exterior of your home.

  1. History of the Home

Check out the history of your home. Do you live in a historic neighborhood? What era was your home built? There are specific colors used for certain time eras. For example, exteriors in the early 1900’s were not afraid to use color. There are earthy red homes with yellow trim and blue homes accented with magenta. By choosing complementing colors and using the color to highlight the architecture you can create a beautiful historic palette. Sherwin Williams Paint Company and Hallman Lindsay Quality Paints both have a historic color palettes and brochures approved by the Historical Society to help choose the right colors from the time period your home was built.

  1. Check out the Neighborhood

When driving through your neighborhood pay close attention to the houses. More than likely there will be homes that look similar and have been built in the time period similar to yours. You can see what you do, and do not like about their colors. You certainly don’t want to copy your neighbors’ colors, but you can get some inspiration and know what you like as you have seen it firsthand. Choose a color that complements what’s surrounded by you.

  1. Roof Color

Look at the color of your roof. There are different types like cedar shake or traditional shingles. If you have multi colored shingles, see what colors tones they contain and choose a corresponding color or a color with the same undertones. Your color does not have to match the roof by any means but should certainly complement it.

  1. What’s Not Being Painted

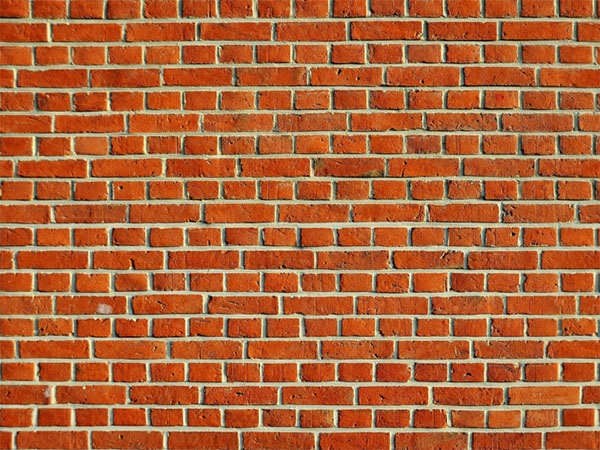
What’s not being painted on your home can help with your color choice. If you have stone or brick, try picking up a color tone from these elements. Other things to look at are vinyl windows, a new front door or other natural construction materials. You want to make sure that all the colors on your home go together in harmony.

  1. Go Light to Add Size or Go Dark for Drama

Choosing a lighter color for the outside of your home will make it appear clean cut and large. If size is not an issue, try using a darker color on the main area and highlight small detail with a lighter color. This combination will highlight small details that can easily be missed with lighter colors.

The post How to Pick an Exterior Paint Color appeared first on Two Day Painting.
Wednesday, July 17, 2019

What us the best coating to protect a deck?

Having a wood or synthetic deck in Wisconsin can be a lot of maintenance! Our climate causes unique problems and an exterior wood/synthetic surface that is walked on, shoveled, power washed, and even air blown will cause coatings to wear and fail quickly if the proper product and preparation are neglected. Let’s dig a little deeper into what’s available, what kind of life expectancy you can expect, and what to look for when buying a deck coating.

The expectations of the life of the coating, as well as the look of the product, will need to be determined before purchasing a deck paint or stain. You also need to determine what your deck is made of. Here are the different types of wood and synthetic options you have in today’s marketplace.

  1. Pressure treated pine – the most common material used for constructing wood decks. Not as costly as cedar or synthetic, shortest life span.
  2. Cedar – has a higher price tag than pressure treated and generally looks more natural. Also, the most maintenance.
  3. Synthetic – composite decks are made of plastics and recycled materials. Highest in cost, longest lasting.
  4. Redwood – rarely used or seen anymore. Extremely weather resistant and costly.
  5. Ironwood/IPE wood – very dense and hard to stain. Cost is similar to synthetic.

There are many choices in deck coatings and which product is best for you will depend on the material of the deck, the overall appearance, and the expectations of how long the coating will last. I’ll break down how often these products are recommended to apply and how they look once finished. I’ll also give you an idea of how long the finish will last.

Pressure treated pine

Type of coating recommended – clear sealer, translucent stain, semi-transparent stain, solid stain, deck “fix” product.

  1. Clear sealer – clear in appearance, one coat application. Apply every year to prevent water from soaking into the boards. Will not prevent wood from turning gray. This coating will not hide anything although it may deepen the natural color of the wood.
  2. Translucent stain – clear coating with a UV stabilizer added to prevent graying of wood. Has a color although it will show all wood grain and texture. Apply once per year. One coat. This coating will hide minor imperfections, but the overall color of the finish will depend on how the wood looks. Always do a test patch so you’re sure you love the color.
  3. Semi-transparent stain – has a color, will hide some of the wood grain although it will look natural and show knots and imperfections. Apply once every other year, one coat. This coating will hide minor imperfections but will still take on some of the color of the existing deck color. Make sure to do a test patch.
  4. Solid stain – your deck boards will look painted. Solid in color. Apply two coats to bare wood, one coat to previously solid stained wood. Apply once every 3-4 years. This coating will hide all imperfections. Pick a color and it will be accurate.
  5. Deck “fix” products. These coatings are thick, and they fill imperfections well. They’re designed to be used over badly worn decks that are full of splits and cracks. Solid, painted look. 1-2 coats every 3-4 years. This coating hides all imperfections. Pick a color and it will be accurate.

Cedar, redwood

See above. These materials will generally look better with a clear or translucent coating due to the quality of the wood, one coat application. Once per year.

Synthetic decks

Must be coated with a solid deck product and that product must be specific and recommended for synthetic or composite decks. Generally, the solid coating used on these decks will give you 3-4 years of decent wear, one coat. Solid finish pick a color and it will be accurate.

Ironwood/IPE wood

The most difficult wood to stain. Very dense. A clear sealer or a translucent stain only. Apply a light coat once per year to prevent graying of wood. This coating will not hide any imperfections. Do a color test patch.

Asking a paint professional to recommend a product is also a great choice. This will give you an idea of what’s out there brand wise and what to expect. It all depends on your expectations and how prefect/imperfect the deck will look. Decks will get dirty. Decks will show some wear in a years’ time depending on how often you use the deck and for what purposes. It may take a beating from the sun, the kids, or the dog, or your guests. Remember, It’s the same as having a wood floor on the outside of your house! We also live in a climate with major temperature swings and snow. There are no “miracle” coatings out there for decks. Temper your expectations. Good luck!

The post What us the best coating to protect a deck? appeared first on Two Day Painting.
Wednesday, July 3, 2019

Can I Paint My Brick?

Brick is a beautiful natural element that adds character to any interior or exterior space. It comes in a variety of colors. The most common brick colors are red brick, cream city brick and dark brown brick. A common complaint with brick is not being able to change the color and making sure your color scheme fits with the color and style of brick. Fortunately there are steps you can take to change the color of your brick to update your style or fit your color scheme! Here are a few popular techniques used;

painting brick

Red Brick

Cream City Brick

Brown Brick

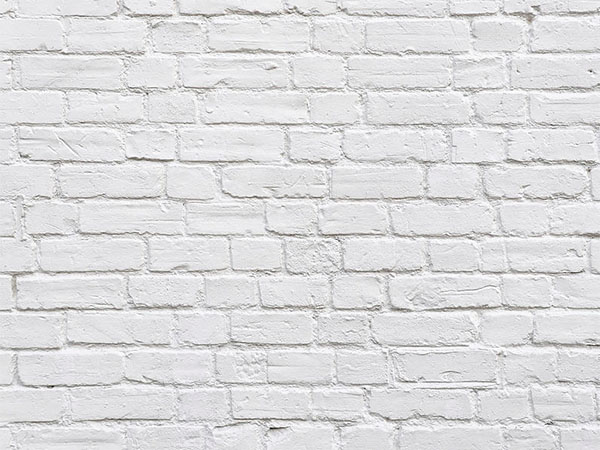
Painted Brick– Painting brick is the easiest option and completely covers the original brick color. First, you must wash the brick thoroughly. If your brick is older and starting to crumble you must get this patched prior to painting. The paint is only as good as the surface you are putting it on. Second, apply a concrete, brick and masonry primer to the surface. Brick is an extremely porous substrate and primer will help fill and seal. Lastly, apply the paint! You can use any color and sheen that fits your style.

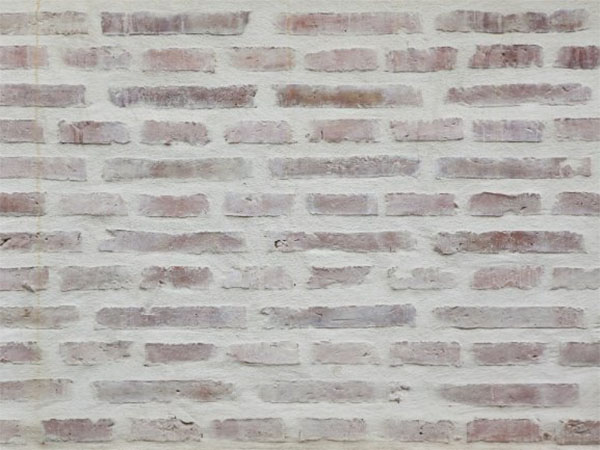
White Washed Brick with Paint– White washing brick take a little more finesse than painting. White washing brick is transparent, so you will still be able to see some of the natural color coming though. This is a way to slightly change the color or look and tame down the intensity of the current color. First, wash the brick thoroughly and make any necessary repairs. Second, mix your white wash solution which is usually 50% water with 50% water based paint. You can play with the ratio to suite the look your going for. The more water the more transparent the result will be. Lastly, apply the white wash. You can use a brush and rag to apply. Go light with the wash at first. You can always come back and do a second coat if you are looking for more coverage.

Natural Lime Washed Brick– Lime washing brick is a natural option for giving you the white washed look without using paint. This mixture is durable unlike the paint mixed with water. First, clean and repair any areas of the brick. Second, mix your lime wash solution. 5-parts hydrated lime, 1-part table salt and water. The mixture should be the consistency of thin pancake batter. Lime is non-toxic and natural but is super alkaline so use a mask and gloves. Lastly, spritz brick with water. It needs to be slightly damp. Then use a paintbrush and apply wash to brick. Let dry. It takes much longer to dry than paint. You can do multiple applications <waiting 24 hours between> to achieve the opacity that you like. Lime wash will have a gritty natural finish that looks great on brick!

painted brick image

Painted Brick

white washed brick

White Washed Brick

lime washed brick

Lime Washed Brick

The post Can I Paint My Brick? appeared first on Two Day Painting.
Thursday, March 14, 2019

Should I paint my house before I sell?

The U.S. real estate market has been on a steady uptick since its devastating crash in 2008. Some segments of the market have even made a full recovery. Even though the Real estate market is good, many people still ask themselves the question, “Do I want to spend additional money on my home prior to listing it for sale?” Most Realtors will suggest painting your home, or at least partially painting, prior to listing. Of all the possible home improvements, painting generally will provide the best value for your dollar.

A paint brush isn’t a magic wand, however in a competitive market, making your house as appealing as possible to the widest range of potential buyers is the best way to sell fastest and get the highest sale price.  As we mentioned, the value of a good paint job can typically be recouped with a higher sale price. There are two types of painting to consider, interior and exterior.

Interior painting is all about aesthetics. Homes are lived in. Which means walls get scuffed, dinged, and smudged. Your burgundy dining room may now be several decades out of fashion. The most important thing a seller can do is create a clean, neutral, and presentable space for a new owner to feel comfortable in.  By choosing a neutral color most prospective buyers will find it agreeable. Even if your choice is not their favorite, they should feel comfortable with the clean palette until they decide to paint at some point in the future. Buyers need to envision themselves in the house as its owner before they will buy. A professionally applied fresh coat is the best way to make this happen.

Exterior paint provides two critical elements to your home’s marketability, maintenance and curb appeal. Exterior paint is designed to protect your home against the elements. Most buyers are unwilling to have to tackle major maintenance projects and pay full list price. Making sure your paint is in good condition will lead to a higher sale price. If your paint is failing a smart seller will use it as leverage to negotiate a lower price.  Perhaps most important is curb appeal. How does your home look compared to other homes in the area?  As a prospective buyer approaches your home what first impression do you want to give them?  A professionally, freshly painted house can make your house stand out as the best among the competition. Again, use caution with color selection. Find a color that fits the neighborhood and can be enjoyed by the largest number of buyers as possible. Spend the money. Paint the house. Making the investment to maximize your houses value is always a good choice and it will greatly increase your odds of a fast, successful sale.

The post Should I paint my house before I sell? appeared first on Two Day Painting.
Wednesday, February 20, 2019

How to Paint Over Painted or Stained Woodwork

Painting over previously painted or stained woodwork can be quite the project. There are several steps that need to be taken to ensure a quality finished product. The first decision to be made is whether to do it yourself or hire a professional contractor. A great deal of money can be saved by doing it yourself, but it can also turn into a nightmare with less than satisfactory results. Here are some general guidelines to consider when undertaking this project.

Scraping

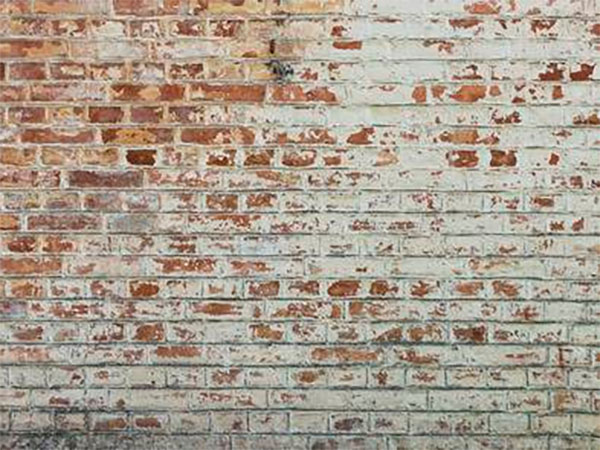
Older woodwork may have layers of paint or varnish that you may need to remove before you can paint. If you leave these layers alone and just paint over them, you can end up with uneven surfaces. Proper preparation before painting old wood helps you achieve professional looking results. Old wood may also have areas where the paint has peeled off the surface. To prevent the loose paint from causing new paint to flake, you should use a hook scraper, putty knife or sanding tool to remove the loose paint. If the old wood surface is covered with many layers of paint and varnish and you would rather remove all of them, you can scrape the layers down to bare wood.

Patching

The old wood may have holes, gaps or deep scratches from its many years of use. You can hide these imperfections so that they don’t show once you finish painting. Wood epoxy fills any depressions in exterior and interior wood to raise them to the level of the rest of the surface. Apply as much wood epoxy as necessary to raise the depressions slightly higher than the rest of the surface to allow for sanding.

Sanding and Cleaning

Sanding provides a surface that is even enough to look good after painting and coarse enough for new paint to adhere to it. Sand the old wood until the finish seems dull. Sanding produces dust, which may make it difficult for new paint to stick. As such, you should wipe the old wood surface with a mixture of 1 cup bleach, 1 cup trisodium phosphate (TSP) and 2 gallons water. Let the wood air-dry before you apply primer. Cleaning kills any mold and mildew in the old wood. Avoid using a power washer to minimize damage to the wood.

Primer

Before painting, apply primer to the old wood surface, whether it is indoors or out. Primer helps paint stick and improves the coverage, so you can dramatically change the color of the old wood if you want to. Using alkyd primer also helps the wood last longer because it contains preservative resins. You should allow the primer to dry completely before applying paint to the old wood surface for proper coverage and adhesion.

 A fresh coat of paint can bring any woodwork back to life. However, it takes more than just slopping on a coat. Proper preparation is very important and finish coating takes a certain level of skill. In many cases, the logical choice is to hire a professional painting company that has the knowledge and experience to give your project a beautiful look.

The post How to Paint Over Painted or Stained Woodwork appeared first on Two Day Painting.

Wednesday, February 13, 2019

Best Way to Protect a Deck

Having a wood or synthetic deck in Wisconsin can be a lot of maintenance! Our climate causes unique problems and an exterior wood/synthetic surface that is walked on, shoveled, power washed, and even air blown will cause coatings to wear and fail quickly if the proper product and preparation are neglected. Let’s dig a little deeper into what’s available, what kind of life expectancy you can expect, and what to look for when buying a deck coating.

The expectations of the life of the coating, as well as the look of the product, will need to be determined before purchasing a deck paint or stain. You also need to determine what your deck is made of. Here are the different types of wood and synthetic options you have in today’s marketplace.

  • Pressure treated pine – the most common material used for constructing wood decks. Not as costly as cedar or synthetic, shortest life span.
  • Cedar – has a higher price tag than pressure treated and generally looks more natural. Also, the most maintenance.
  • Synthetic – composite decks are made of plastics and recycled materials. Highest in cost, longest lasting.
  • Redwood – rarely used or seen anymore. Extremely weather resistant and costly.
  • Ironwood/IPE wood – very dense and hard to stain. Cost is similar to synthetic.

There are many choices in deck coatings and which product is best for you will depend on the material of the deck, the overall appearance, and the expectations of how long the coating will last. I’ll break down how often these products are recommended to apply and how they look once finished. I’ll also give you an idea of how long the finish will last.

Pressure treated pine

Type of coating recommended – clear sealer, translucent stain, semi-transparent stain, solid stain, deck “fix” product.

  • Clear sealer – clear in appearance, one coat application. Apply every year to prevent water from soaking into the boards. Will not prevent wood from turning gray. This coating will not hide anything although it may deepen the natural color of the wood.
  • Translucent stain – clear coating with a UV stabilizer added to prevent graying of wood. Has a color although it will show all wood grain and texture. Apply once per year. One coat. This coating will hide minor imperfections, but the overall color of the finish will depend on how the wood looks. Always do a test patch so you’re sure you love the color.
  • Semi-transparent stain – has a color, will hide some of the wood grain although it will look natural and show knots and imperfections. Apply once every other year, one coat. This coating will hide minor imperfections but will still take on some of the color of the existing deck color. Make sure to do a test patch.
  • Solid stain – your deck boards will look painted. Solid in color. Apply two coats to bare wood, one coat to previously solid stained wood. Apply once every 3-4 years. This coating will hide all imperfections. Pick a color and it will be accurate.
  • Deck “fix” products. These coatings are thick, and they fill imperfections well. They’re designed to be used over badly worn decks that are full of splits and cracks. Solid, painted look. 1-2 coats every 3-4 years. This coating hides all imperfections. Pick a color and it will be accurate.

Cedar, redwood

  • see above. These materials will generally look better with a clear or translucent coating due to the quality of the wood, one coat application. Once per year.

Synthetic decks

  • must be coated with a solid deck product and that product must be specific and recommended for synthetic or composite decks. Generally, the solid coating used on these decks will give you 3-4 years of decent wear, one coat. Solid finish pick a color and it will be accurate.

Ironwood/IPE wood

  • The most difficult wood to stain. Very dense. A clear sealer or a translucent stain only. Apply a light coat once per year to prevent graying of wood. This coating will not hide any imperfections. Do a color test patch.

Asking a paint professional to recommend a product is also a great choice. This will give you an idea of what’s out there brand wise and what to expect. It all depends on your expectations and how prefect/imperfect the deck will look. Decks will get dirty. Decks will show some wear in a years’ time depending on how often you use the deck and for what purposes. It may take a beating from the sun, the kids, or the dog, or your guests. Remember, It’s the same as having a wood floor on the outside of your house! We also live in a climate with major temperature swings and snow. There are no “miracle” coatings out there for decks. Temper your expectations. Good luck!

The post Best Way to Protect a Deck appeared first on Two Day Painting.

Friday, February 8, 2019

What is the Best Color for a Ceiling?

When picking a color for your ceiling, first look at the shape of the room. Is it an open concept with a ceiling that spans more than one room or an individual room with its own ceiling? Is there height variation or is it flat? The shape of the room will determine the best options for you.

Many people are under the assumption that ceilings must be white and this isn’t always the case. White is a simple and safe way to go.

If you enjoy changing your wall colors often or have a difficult ceiling to paint than white or a shade of white is usually best. Otherwise, you’ll want to paint your ceiling with each color change.

The ceiling is the fifth wall in a room and should be treated as such. If you have white or light color on the walls, adding a color on the ceiling can make the space feel finished and add character.

Try a soft blue for a wispy, airy feel or a navy for an elegant, dramatic feel. Vaulted ceilings and large connected ceilings are great because it lifts and expands and makes the room appear larger.

Choosing a lighter tone of your wall color for a large ceiling will minimize the stark contrast and make the space feel cohesive and simple. If using a bright ceiling white with a darker wall, it can cause harsh lines and actually make the room appear smaller. And if using a lighter wall color don’t rule out using that same color for a large or vaulted ceiling. And if you have a large flat ceiling without a crown or break, using a lighter shade would be best. The lighting and shadowing may make the same wall color appear a bit darker.

If the area is a main living area, stick to neutrals. It is easier for decorating and will cater to everyone. For an individual space like an office, bedroom or rec room, don’t be afraid of bold colors. If you’re not one for a colorful ceiling and are looking for a white don’t fret. Even though there are many whites, there is an easy solution. Look for the undertones. Some whites are stark, cool or warm. If you have a taupe, beige or warm gray choose a white with a warm undertone. A couple favorites are SW 7004 Alabaster and HL 0011 Sugar Dust. If you have a blue, green or cool gray choose a white with a cool undertone. A couple favorites are SW 7005 Pure White or HL 0600 Melting Glacier. If you have white trim use the same color on the ceiling! It incorporates the color and ties the room together. Finally, have fun with your color!

The post What is the Best Color for a Ceiling? appeared first on Two Day Painting.